Set project - 3D work (process)
This is the process of 3D work and how I embroidered on the fabric as making the pattern for the project. Like the last posting about 3D work, I embroidered on the wet fabric with watercolour based.

I prepared basic cotton fabric.

I dyed the fabric with the watercolour on the dried fabric, but it didn't work.

So, I dyed clean and pure water on the fabric first.

and added background colour on it.

adding more colour on it

This is how it looked after dried.

I sewed silver thread on the fabric.


I began to embroider according to the pattern that I made.

After sawing like this, I realized that I should have to embroider in a different way because I supposed to add dark colour in the middle of the embroidery, so I took it off and did it again.

I sewed it as remaining the little whole in the middle.


and embroidered different colours as arranging in right places.


added dark colours around bright colours.

added more colours to fill the empty spaces.

To give it sparkle, I added beads and nail glitter ring.


I added navy coloured embroidery, but it didn't really harmonize altogether.

So I picked and took off that colour of thread.

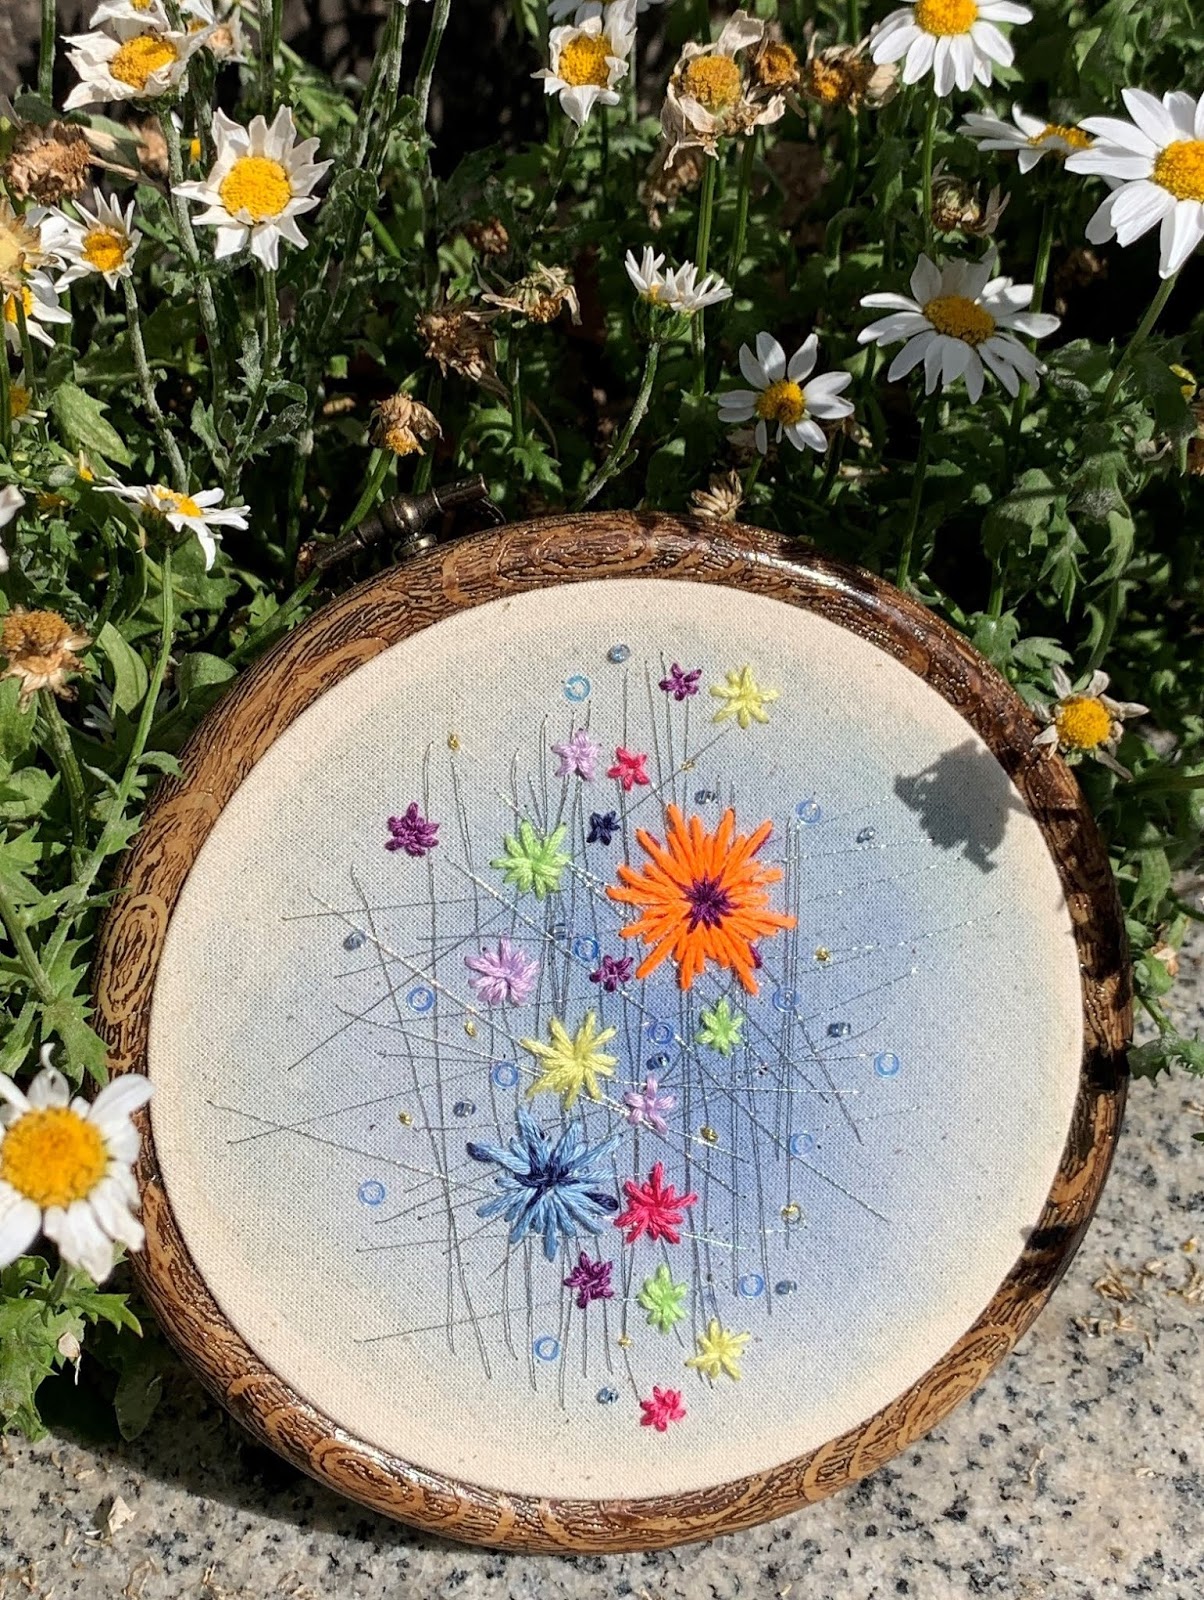
This is final outcome for 3D embroidery work from 4th knicker design's pattern.
I had a lot of worries about this project because I had literally no idea to do 3D work. After countless concerns, I decided to make a self-made pattern on the kicker. I also had a lot of worries and concerns to embroider especially, because it was the first time I embroidered myself. As the tutor advised, I bought the materials for the embroidered kit and tried in different ways for this work, The journey was not easy at all, but it was fun and enjoyable than I thought. With this precious practice, I think I will be able to design without hesitation when I design embroidery next time. It was a meaningful experience.


Comments
Post a Comment